September 5, 2013

Homemade Peach Ice Cream

Who can feel the Fall approaching? I know it's in the air and I love it! Who doesn't love Fall? I even got married in the Fall.
Here in Roswell, New Mexico it gets hot, hot, hot here during the summer months so come the end of September we are loving the lower 80 degree temperatures.
Even though Fall is right around the corner and I'm already thinking about how I plan to decorate, I still feel the summer weather and when it's hot outside everyone loves ice cream! Especially when it's homemade ice cream.
Oh yes we are going to make HOMEMADE PEACH ICE CREAM!!! I love homemade peach ice cream. So what are we waiting for?
You will need to do this step the night before.
 First you will need 3 peaches.
 Chop them in small pieces.
 Add a 1 cup of sugar to the peaches.
(You are doing this to make a syrup)
 Cover and let it sit overnight.
 Here's what it looks like the next day...doesn't that already look delicious?
When eating fruit ice cream I like to have the chunks in it so I chop them up fine.
If you leave them big they will be hard to chew when you put it in the freezer.
But if you don't want the chucks at all, just leave it in the syrup and puree it in a blender.
Here's a glance at the syrup.
Next I add 2 teaspoons of vanilla to the sugar and then add the peaches back to the syrup.
(If you pureed it just add the vanilla to the puree)
Add 1 Pint of Heavy Whipping Cream to the peach mixture.
Add 1-14 oz of Sweetened Condensed Milk to the peach mixture.
Add the mixture to your ice cream container.
Next we will add 1 pint of Half and Half to the peach mixture.
I like to wait to add this until after I put the peach mixture in the container to make sure that I don't go over the max line but you shouldn't have any problem with that.
See right at the max line! I like to make the max amount of ice cream!
After I add the mixture to the container I like to set it in the freezer for about an hour to chill it before churning it.
Next churn your ice cream according to the instruction manual.
 Yummy! Peach Ice Cream!
NOTE: I like to add about 7 drops of red food coloring and 3 drops of yellow to give it that peach color, but you can leave that part out if you want. It just looks more flavorful for the kids. If you want to do this add it when you put in the half and half.
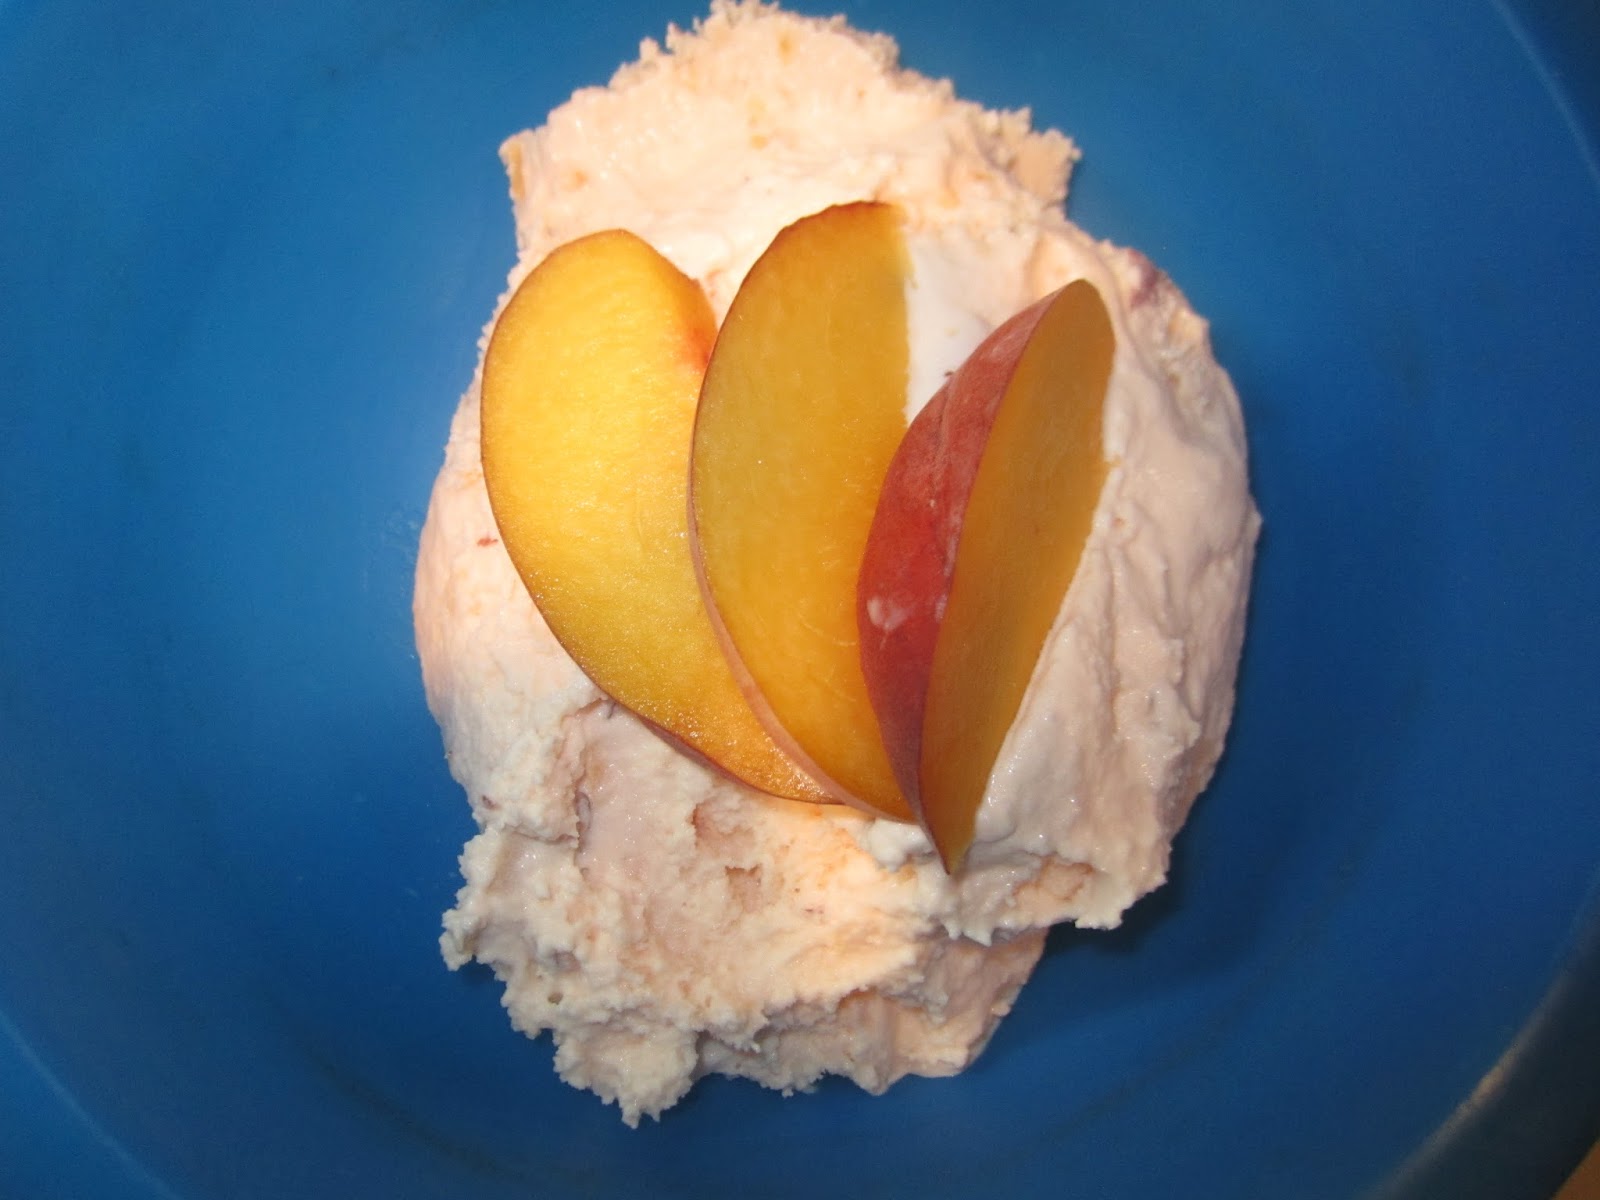
Who could resist some oh so good peach ice cream during the summer?

 The kids loving it and acting silly! They said they were trying to get a stache (short for mustache) freeze lol.
You can you this recipe for any fruit ice cream if you want.
NOTE: I don't like a whole lot of sugar in my fruit ice cream because I like to taste the fruit but you can always add more sugar to your liking.

For a printable version of this recipe CLICK HERE.

September 1, 2013

Bland To Grand

I've shared just about everything in my living, so make sure you tune in next Monday to see the Living Room Reveal!
Today I'm taking BLAND TO GRAND!
Sometimes it's those simple touches that make a difference when decorating.
It's simple and usually don't cost a whole lot of money but yet adds the finishing touches to give your room that WOW factor!

~These next couple of  ideas are some things that are used to decorate my Wood Pallet Entryway Table.~
Here's a simple little pot.
I loves these cute little pots...I find them extremely adorable, but you can't really do a whole lot with them because they are so tiny.

I had an idea...so I spray painted each one of them with the color theme of my living room.
I added a couple of these flower candles to them and now I have "flower pots"/"candle holders"
But I couldn't stop there I had to put them somewhere.....
Remember this? It's in a couple of my post, it needed something, but nothing to take away from it.
Ta-Da..... doesn't it look so cute! Little flower pots in front of a barn!
Here's some plain glass vases, so it seems.
Add some decorative decor-balls to it and you got easy decor.
But you need that BANG! Use them as book ends!
By the way I highly recommend these Christian books!
Here's some boring wood pieces to match my old wood theme in my living room.


 Here's some metal decor I got at the dollar store and painted the color theme of my living room.
Add some plants (cactus')...please forgive the blue one.
I had a succulent in there and as I found out there are certain little bugs like succulents.
Needless to say I haven't got around to replacing it or the others.
More about that story later.

Put the them together and drum roll please......
You got some superb decor (especially when the blue bowl has a plant in it)!

~Now the next ideas are what I use to decorate the wall above the entryway table and YES you get a sneak peak before I reveal it on Monday!~

Here's a plain piece of old wood......

Add some paint and some words and you got an awesome 'THIS HOME BELIEVES' sign!

Here's some plain clothes pins.......

Add some paint to them and put on a plain board......

But don't stop there add some paint and words to this board too (oh but not in that order)!!!!

Add some pictures and as easy as that you got a picture hanger (that you can switch in and out anytime), and decor for your plain wall!!!

~Sorry I don't have before pictures of these next items but I got them at Walmart for cheap in 3 different sizes~

This was a plain 'crate' you add some paint and antique it.....

But before you leave it add some cute decor to it..... ain't that just marvelous?

Another one painted.....

And another one filled with some precious decor!

Here's one painted with all the colors of my living room....

Again another place for decor, isn't that just fantastic?

~Remember I told you that I was going to talk more about the bugs eating my succulents? Well here's what I'm talking about.....~

 This cute glass had a succulent ....

 And so did this one....

 And this one had my favorite succulent :(
As you can see I have not replaced any of them, but I do have some ideas for them!

Here's a painted wood crate....

 Added decor and another dead succulent, but you get the idea right?
It used to be cute and will be again, I promise!

 Another painted wood crate....

 More dead succulents, a cactus, and added decor.
Looked great at one time but I do want to replace this with more plants.
So maybe you can kind of picture what used to be and what it will be again...someday, soon, hopefully!

 How easy was that?
BLAND TO GRAND!!!!!
So what fun pieces have you used that were simple, low cost, and made a big difference?
I'm always up to hearing ideas!

09 10